Getting Started in Obby Builder
Tutorial, first plot, cash, and a shareable slot code.
Join Obby Builder on Roblox from the official place, then stay in a 10-player server. The lobby is noisy on purpose: other players load Trending courses, test plots, and paste slot codes. Your first hour is not a shopping trip. Finish the tutorial, place a tiny readable course, copy a slot code, beat one community obby for cash, and join the group. Plot-size gamepasses wait.
Obby Builder Studio shipped this sandbox on 7 July 2025. Servers use R6 avatars. You can play on PC, mobile, tablet, or console. If a friend is on a different device, skim Controls before you both grab hammers.
Join, tutorial, and the Welcome badge
Open the experience and complete the building tutorial all the way through. The tutorial is short, but it is the only onboarding that awards Completed the Tutorial. Welcome usually lands when you first join. Those two badges sit on the badges page with Got a Like and Beat an Obby. Do not skip the tutorial to “save time.” The hammer, part picker, and Slots UI make more sense after it.
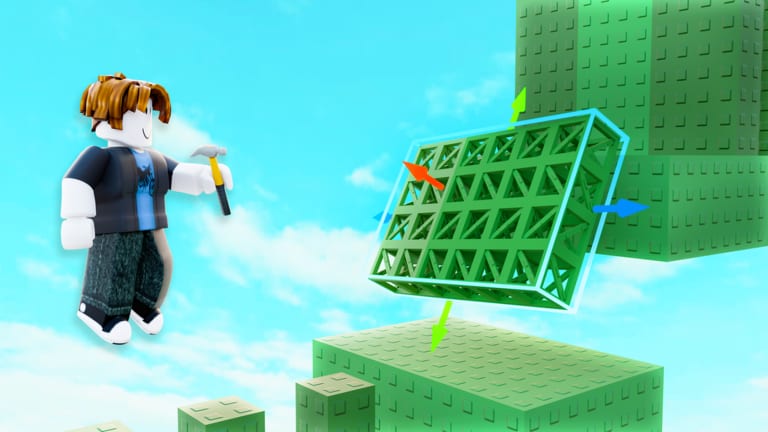
Stay public. Private servers hide the 10-player traffic you need for a real playtest. If the tutorial camera feels odd, that is normal: official shots show a first-person hammer and RGB axis arrows on selected parts. You will use those gizmos again in How to Build.
Join the Obby Builder Studio group in the same session. The group has well over 100,000 members and is the advertised home for bonus rewards. Group join is free. It is not a promo-code box. As of this writing there are no official cash redeem codes; the codes that matter are slot codes.
First plot: spawn, platforms, checkpoint
Claim a plot and place three things before you decorate.
First, a spawn. Runners need a predictable start. Put it on a wide, flat pad so mobile thumbs do not walk off the edge during load.
Second, a short run of platforms. Use ordinary platforms, not killbricks. Keep the first jumps one or two studs, with a visible landing. Truss-style parts can wait until you can climb without falling through. Rainbow Parts (99 Robux) is a color pack, not a layout pack. You do not need it for hour one.
Third, a checkpoint. Place it after the first easy sequence, not at the finish line. A course with no checkpoint teaches people to leave. One checkpoint plus a clear end pad is enough to share.
Optional extras if the tools are already unlocked: a sign with the course name, a button that opens a simple door, or music at low volume. Skip one-way movers and advanced lighting until the path is fair. Those tools belong in How to Build, not in a first save.
Playtest yourself without coils. Walk the route on the same avatar you will use to greet friends. If you own Gravity Coil or Speed Coil already from another session, unequip them for this test. A first plot should be beatable on default jump.
Copy a slot code, then earn cash
Open the Slots UI, save, and copy the slot code. That string is how friends load your plot instantly. Keep it somewhere you can paste. The slot codes page covers load, Unlisted, and custom thumbnails. For hour one, leave the course listed unless you are still blocking out air and do not want random runners.
Share the code with one friend or paste it to yourself in another slot as a backup. Unlisted hides discovery; it does not replace a backup. Restore Data in Slots is the panic button if a later edit wipes the plot. You do not need Restore Data yet if you just copied a working code.
Cash comes from playing, not from staring at an empty floor. Leave your plot, open Trending or Highlighted, and beat one community obby. Finishing awards cash and can grant Beat an Obby. That cash is how you unlock more building room without buying Taller, Longer, or Wider. If killbricks or one-way movers keep resetting you, switch courses instead of rage-buying Fusion Coil (149 Robux) in the first hour.
Double Cash (299 Robux) multiplies earnings later. It does not teach you how to place a checkpoint. Spend the first cash on plot space the game already unlocks through play, then go back and lengthen your course by a few platforms.
What not to buy in hour one
Do not buy Taller Obby, Longer Obby, or Wider Obby (199 Robux each) until a stranger can finish the current layout. A huge empty plot earns fewer likes than a tight 30-second course with a checkpoint. Do not buy Rainbow Parts until the path is readable in default colors. Do not buy coils to “prove” your own course is fair.
Emotes are cosmetic. They do not place parts. Advanced lighting can wait until signs and checkpoints exist. Custom thumbnails wait until the course has a finish.
After the first cash run, return to your plot and add one more checkpoint or one clearer landing. Then stop. Copy the slot code again. That is a complete first session.
Next reads: Controls if the hammer or gizmo feels awkward, How to Build for traps and lighting, and slot codes before you paste anything in chat. Badge tracking stays on badges. Group link stays on Obby Builder Studio.
Frequently Asked Questions
Quick answers to the most common Obby Builder questions.
What should I place before I share a slot code?
A spawn pad, a short platform run, and one checkpoint. Copy the code from Slots after that save. Details for loading live on slot codes.
Which badge do I get from the tutorial?
Completed the Tutorial. Welcome usually appears on first join. The full set is on badges.
Should I buy Taller, Longer, or Wider Obby in the first hour?
No. Beat one community course for cash and keep the plot small until people finish it. Those passes cost 199 Robux each and inflate empty floors.
Are there promo codes for cash?
We have not found official cash redeem codes. Join the Obby Builder Studio group for advertised bonuses and use slot codes to share plots.
What do I read after this first-hour path?
Open Controls for device inputs, then How to Build for parts, movers, and lighting.